Building a block wall.
Trump will be sworn in in 12 days. Some of you deadbeats will need this information for your new jobs.
Published 8 years ago in Ftw
1
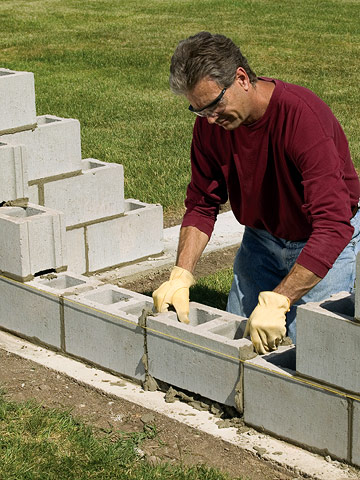
Building between the leads: Step 3 Continue building the leads by moving the mason's blocks up to the next course and properly aligning it. Throw mortar for the following course between the leads, butter the ears of each block and set them, working from the leads to the center and keeping the block a consistent distance from the mason's line.
2
Topping off the wall Cap blocks are made specifically to hide the top cores and provide a finished look. If you're laying cap blocks, throw mortar on the top edges of the last course and lay the first cap block in the corner. Butter the ends of the remaining block and set them centered on the wall, tapping them level. Plain mortar makes an acceptable cap for a block wall, but it requires some support. Lay metal lath into the mortar before laying the last course of blocks. Lay the last course, then core-fill it, overfilling by about 1/2 inch. Level the mortar across the webs, then round its edges to let water drain off more easily.
5
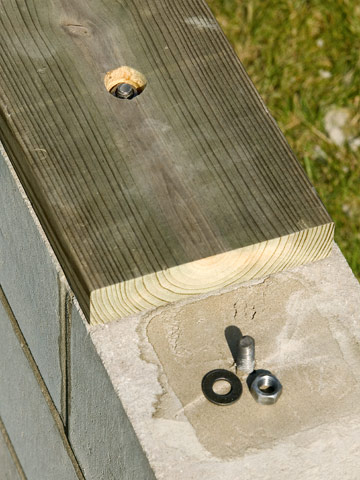
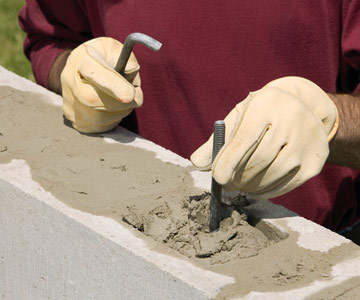
Core-filling the top course: Step 3 If you plan to attach a 2x sill or cap to the wall, embed J-bolts into the mortar. Center a bolt in the core and push it down until about 2 inches remains above the cores (about 11/2 inches if you will counterbore your 2x cap for the J-bolt nuts). Use a layout square to make sure they're vertical.
6
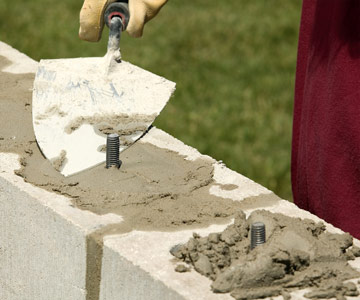
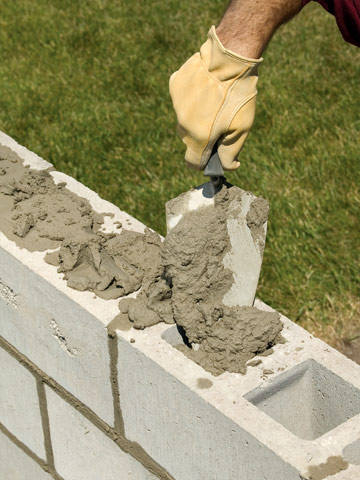
Core-filling the top course: Step 2 Scoop mortar from your mortar box into a bucket so you can carry it with you as you work across the wall. Scrape mortar from the bucket into the cores, overfilling them slightly. Poke the trowel up and down in the cores a couple of times to make sure the mortar is thoroughly distributed.
7
Core-filling the top course: Step 1 Some wall designs call for filling the cores of the top course with mortar (called core-filling). If you're going to core-fill the top course (for J-bolts, for example) cut a length of metal lath to the width of the block and lay it on top of the next-to-last course. The metal lath will keep the mortar from falling through the blocks to the bottom. Then throw mortar and set the top course.
8
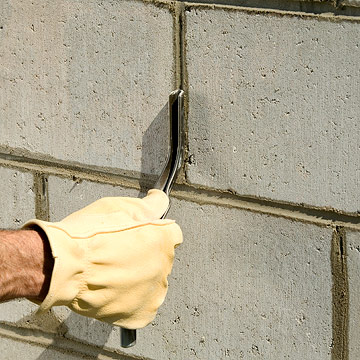
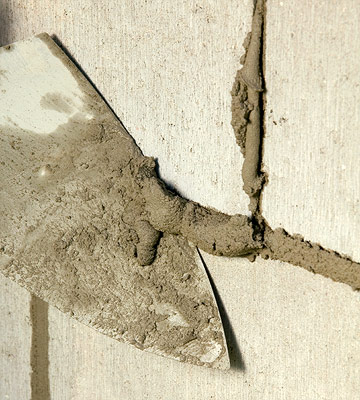
Finishing touches: Step 2 From time to time, stop laying block and check the mortar by pressing your thumb into a joint. When the mortar will just dent enough to hold a slight thumbprint, it's ready for striking. Run a concave striking tool along the joints, compressing them and smoothing them. Strike the horizontal joints first then the vertical joints to allow water to run freely down the wall. Scrape off excess mortar and strike the joints again.
10
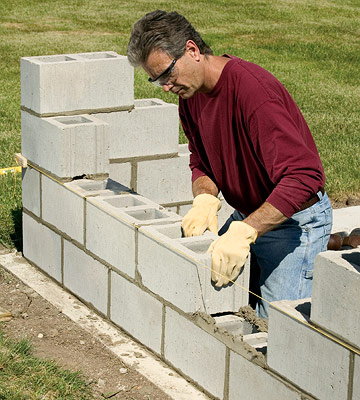
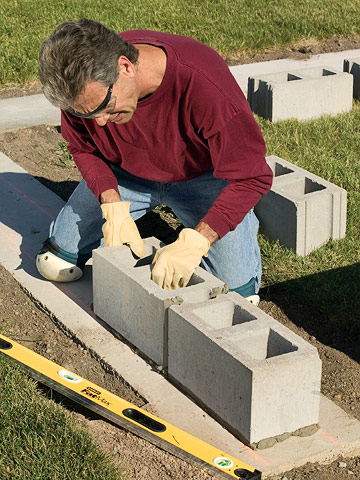
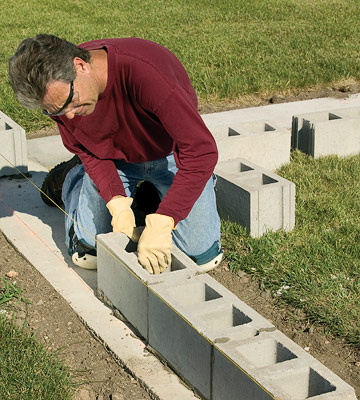
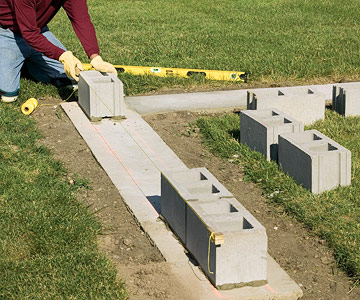
Building end leads: Step 1 Lay out your block in a dry run, spacing it with 3/8-inch plywood spacers. Mark all the edges of the course. Take up the block and spread mortar on the footing. Push the first block into the mortar until it's 3/8 inch above the footing. Mortar the ears of the second block and push it against the first.
11
Building between the leads: Step 2 When you reach the center of the wall and have space for only one more block (the closure block), set that block in the space without mortar. It should fit with enough room for 3/8-inch joints. If there's not enough room, trim the block with a cold chisel or circular saw and a masonry blade. Mortar the ears of the block on both sides and push it into place. Previous | Next
13
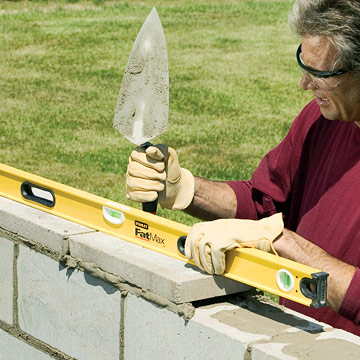
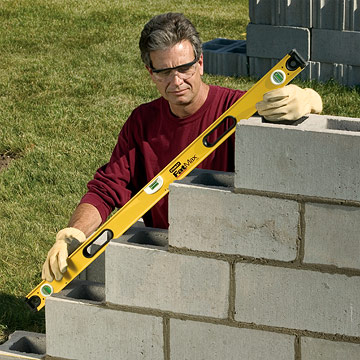
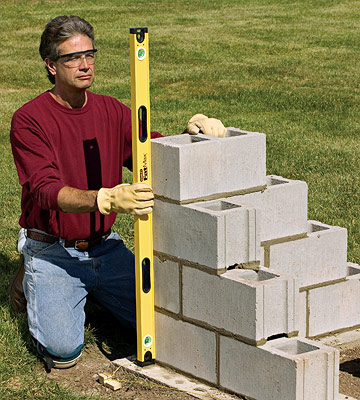
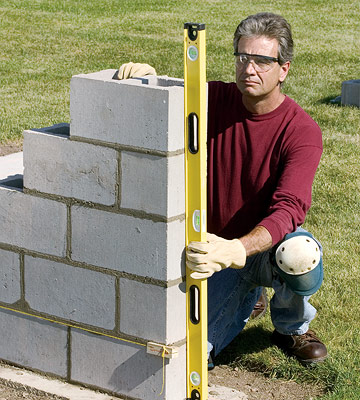
Checking the leads: Step 2 Once a lead is at the correct height, lay a 4-foot level across the edges of the block. If a block extends too far out, tap it in place with the trowel handle. If a block falls short of line, don't adjust it or remove it. Make up the difference across the rest of the course by making some of the joints thicker.
14
Checking the leads: Step 1 When the lead on one end is three or four courses high, build up the lead on the other end, using the same techniques. Be sure to start alternate courses with a half block. If your wall turns a corner, build the corner with alternating corner blocks. As you go, check that the lead is plumb and level from front to back and side to side.
15
Building end leads: Step 4 Build up the lead on one end of the footing by throwing mortar for the second course and starting this course with a half block. Butter the ears of the second block in this course and continue laying the block three or four courses high. Check often for level, plumb, and square. Periodically check the firmness of the mortar by pressing it with your thumb. When you can just dent it, stop setting block and strike the joints.
16
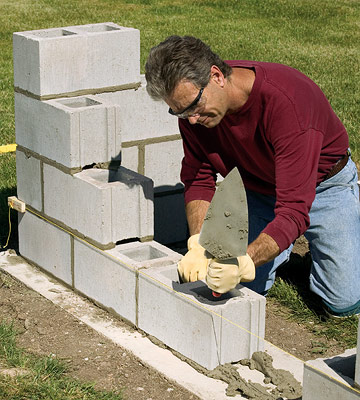
Building end leads: Step 3 Mortar the ears of the next block on either end and push it into place. Adjust the position of the block so it's level along the top of the course and from side to side -- tap the blocks into position with the end of the trowel handle. From time to time and after the mortar has set up slightly, trim away any excess with the trowel.
17
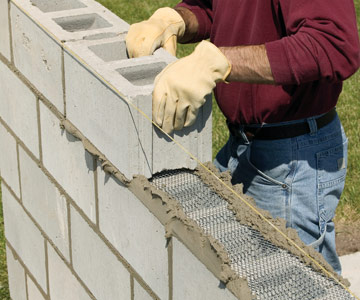
Building end leads: Step 2 At this point, you can continue to build up the lead on one corner, then the other, or build both of them at the same time. To start the other lead, push a corner block into mortar at the other end. You can attach mason's blocks and line from one corner to the other to help keep them straight.
Most Popular